...into THIS:
READY?
STEP 1: Collect all of your programs, and put them in chronological order. I had a stack of 29 programs, so I decided to divide them into two volumes. Take your programs to a full-service copy place like Kinko's or the UPS Store. I went to the UPS Store. For less than $5 each, I was able to have each of my two volumes bound with comb binding and covered with a clear plastic front and black plastic back. It took about 30 minutes for the shop to get it done.
STEP 2: Make tabs for each program so that you can find the one you're looking for quickly. This step is entirely optional, but it took my cool book of programs and turned it into an amazing volume of awesomeness, so I highly recommend it. You can make your tabs using cardstock or maybe buy some pre-made tabs somewhere. I made mine from scratch. Note: I have a Cricut cutting machine, so I didn't have to cut the tabs out by hand. They are a REALLY SIMPLE design, though, so you could sketch out your own tabs and cut them with scissors instead. If you do happen to have a Cricut, you will want to know what cartridge and size I used. The "From My Kitchen" cartridge has loads of different tabs. The one I used was on the "cow" button. :) Really, there's a cow button. You select the tab function and then select the cow. Set your size to 1 3/4 inches. Since I had 29 programs, I cut out 29 tabs using different patterns of scrap cardstock I had on hand. Here's what the tabs looked like before they were folded:
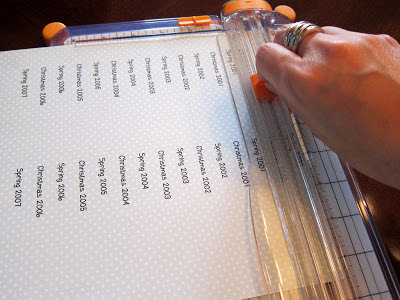
STEP 3: Print a list of dates or other type of label for your tabs. I printed two of each date in order to have labels for both sides of the tabs. I wanted to print my labels on patterned cardstock, but before I ran the good paper through the printer, I printed a sample page on multipurpose paper to make sure the font size was going to fit the tabs. I ended up using a font called "The Last Something That Meant Anything" and font size 14. After you print the date labels, you have to cut them out.
STEP 4: Attach your printed labels to your tabs. I used a strong craft glue because some of the tabs were cut out of glitter cardstock which can be difficult to attach things to. Also, you will notice in the next picture that I ended up cutting the tabs in half. That was just my preference, because the folded tabs had sort of a bumpy edge that I didn't like.
STEP 5: Attach your tabs to each program cover. You could do this any way you like but I staggered mine so that there would be four tabs visible at a time.
 |
| This is the reverse side of the same tab shown in the previous picture. |
Continue adding tabs until each program is labeled.
STEP 6: Make a title for the spine of your program book(s). I used the same polka dot cardstock, font, and font size I used for the labels and included my studio logo as well. To adhere your spine label, you could use any type of strong adhesive you have on hand. I tried two different methods for my two volumes. For one, I used the craft glue shown above. I think it's made by Making Memories. For the second, I ran the title through my Xyron sticker maker. Both worked, but I think the glue was a little more effective with the plastic comb binding.
 |
| Before removing the title "sticker" I wrapped it around a pen to help shape it for the comb binding |
I really like how these turned out! It took two to three hours to make the tabs for one volume, but it probably would have gone quicker if I had not used glitter cardstock (which made craft glue necessary) and had printed my labels on sticker paper or tiny Avery labels. But it was a fun project, and what are summers for anyway?!


